
Create the First Payment Profile
Start with a simple profile that has no conditions. This confirms website, audience and payment-method assignment before condition logic is introduced.
Example goal
Allow the store's existing bank-transfer and check or money-order methods for the Wholesale customer group on the Main Website.
Create the profile
- Open
Customers > Payment Profiles. - Select Add New.
- Enter a descriptive name such as
Main Website - Wholesale Standard. - Set a unique priority, for example
100. - Select the website.
- Select the Wholesale customer group.
- Select only the payment methods this audience may use.
- Leave Conditions empty for the first test.
- Save the profile.
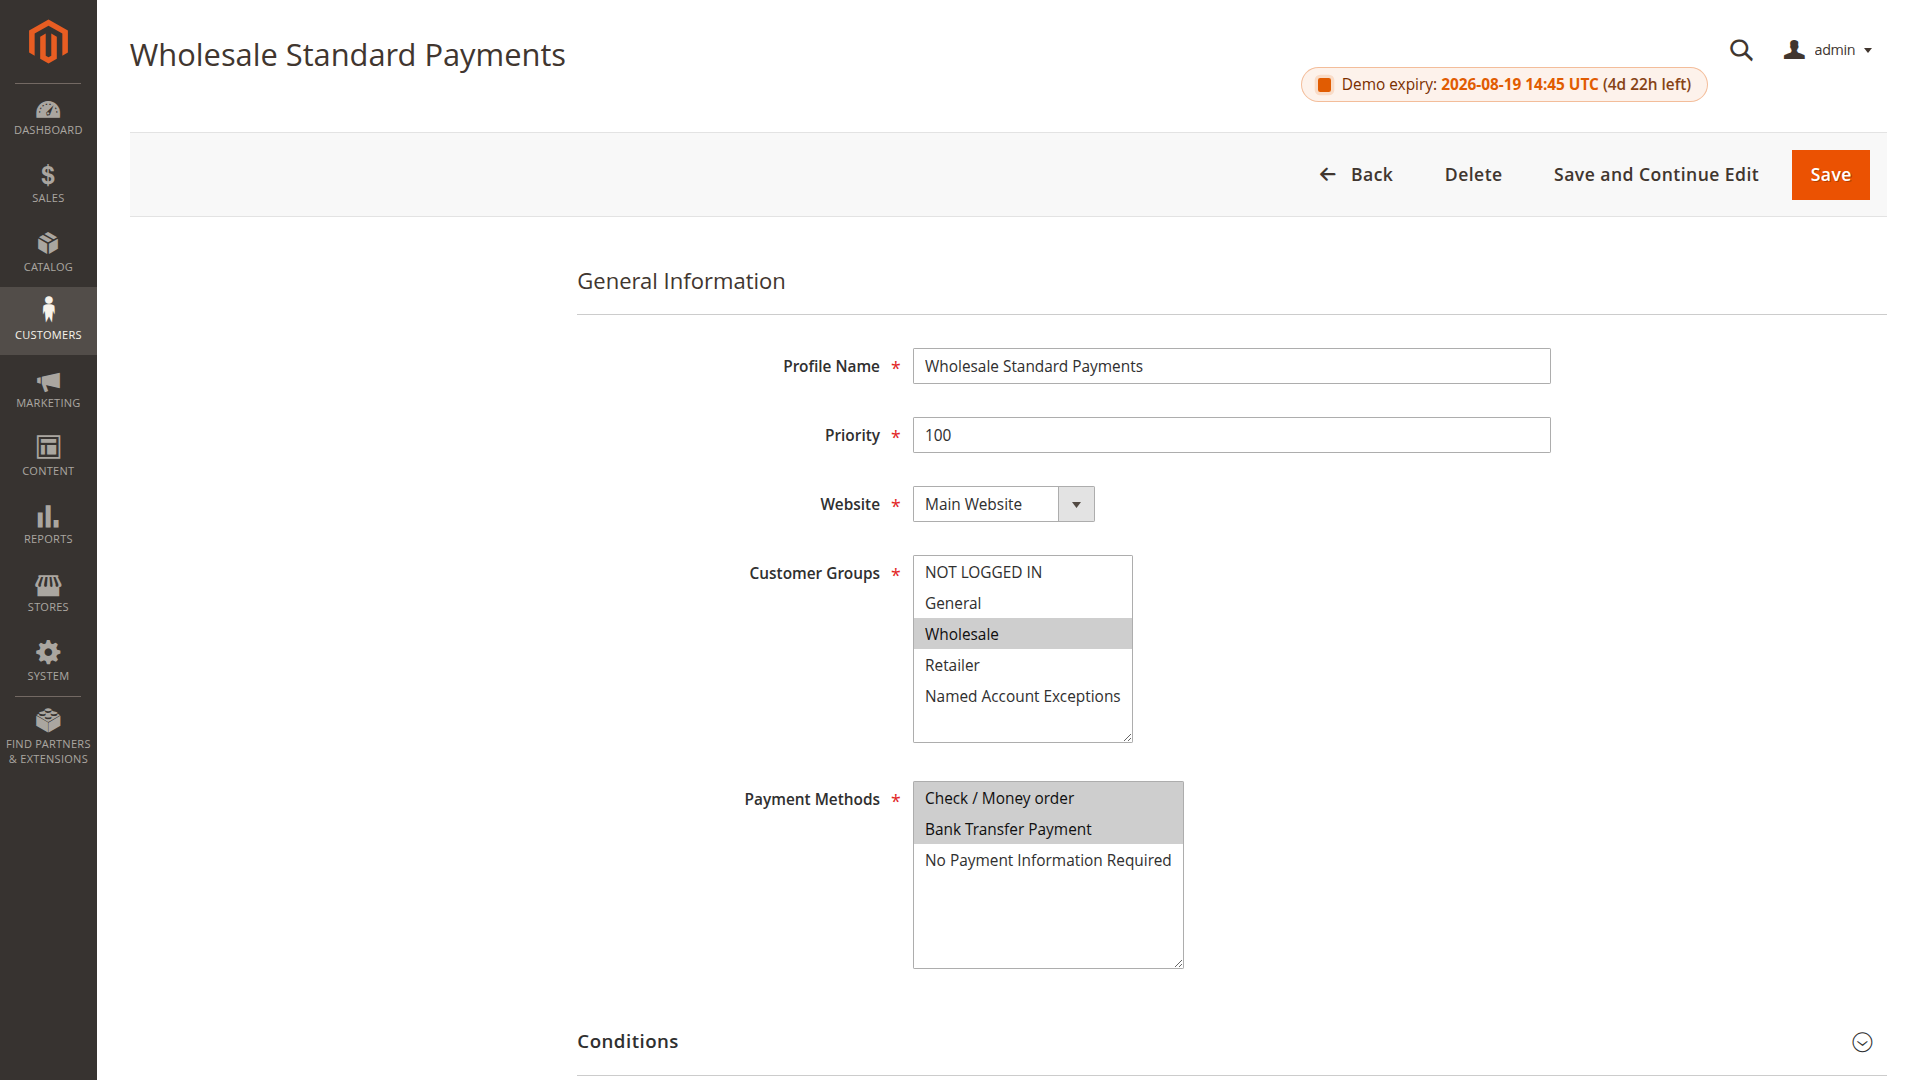
The payment-method list is refreshed for the selected website. If you change the website, review the selected methods again before saving.
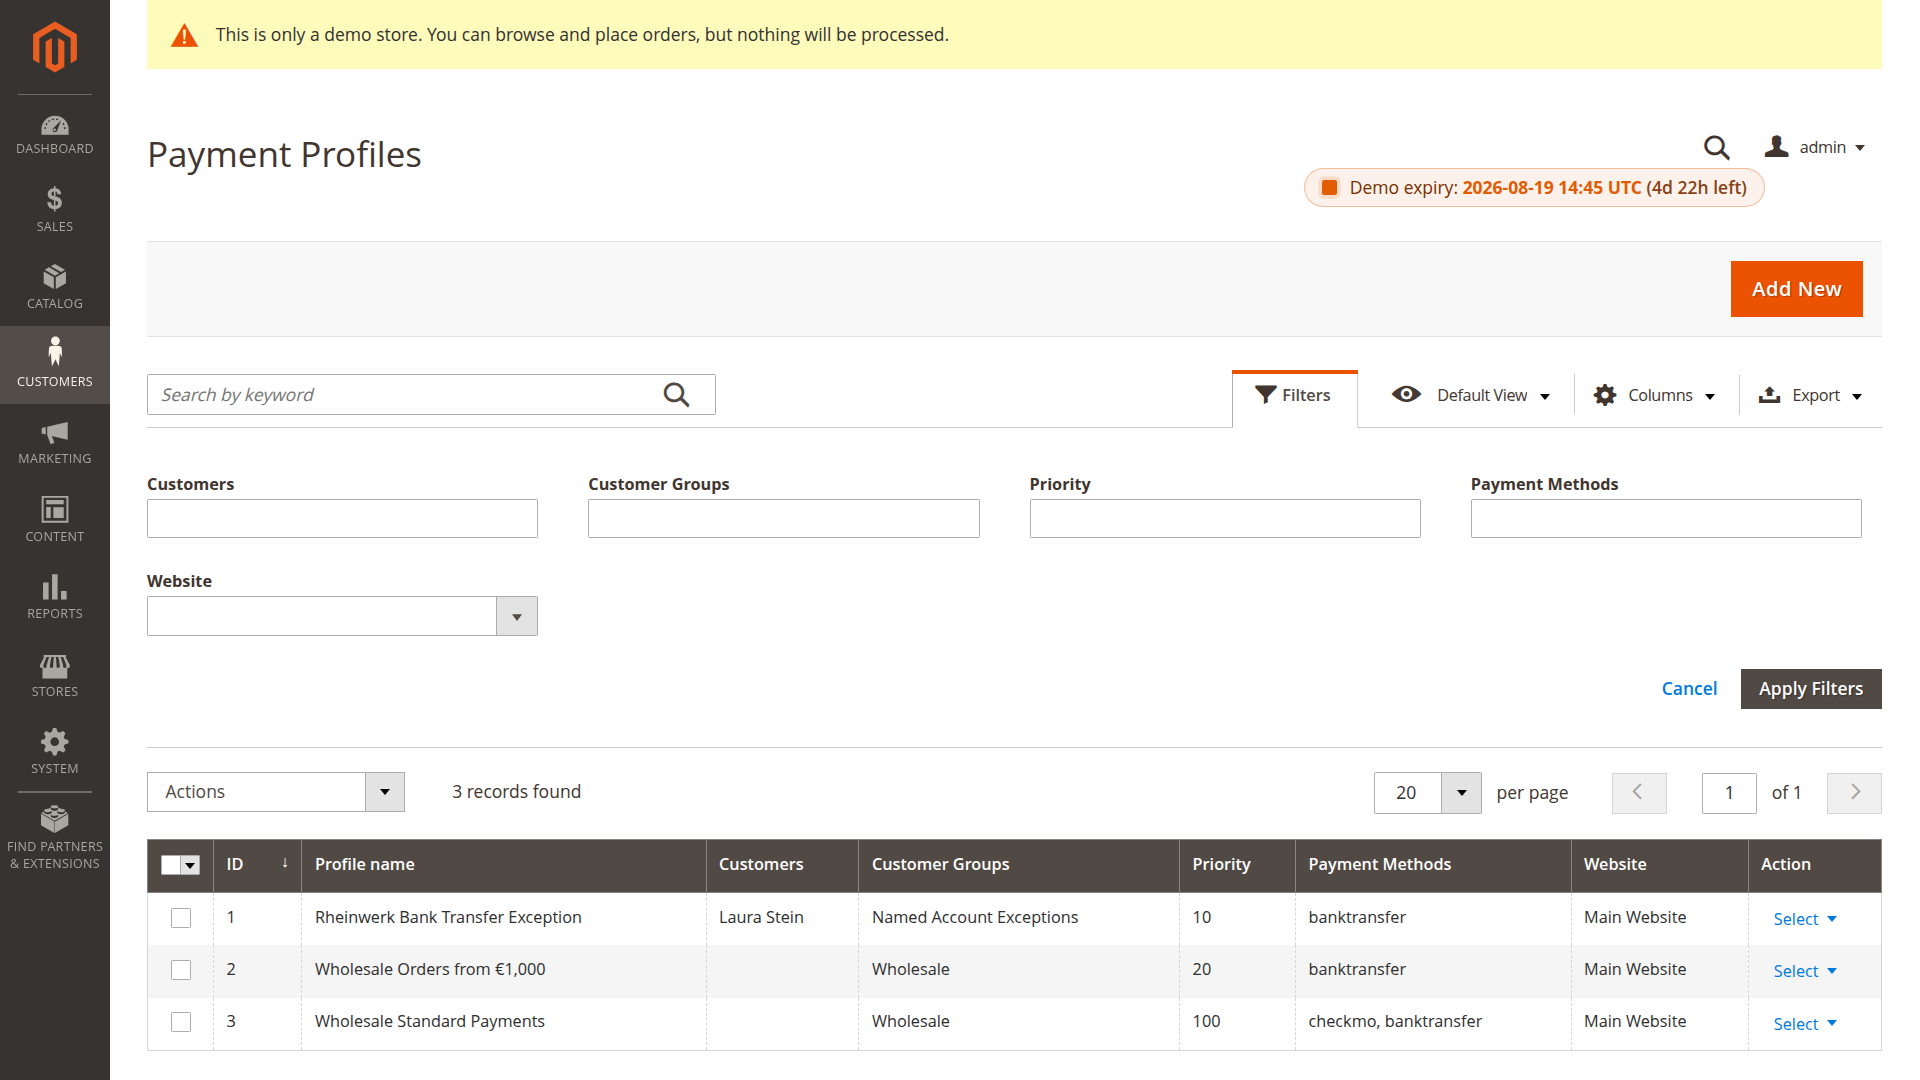
Test the profile
Use a real checkout flow with a fictional test customer in the Wholesale group:
- Confirm both selected methods work when Payment Profile is disabled.
- Enable Payment Profile.
- Add an ordinary shippable product and proceed to payment.
- Confirm that only the selected, otherwise available methods remain.
- Repeat with a customer group that is not assigned.
- Confirm that the result matches the configured no-match policy.

Add one condition
After the basic profile works, add one easy-to-reproduce condition, such as a subtotal threshold. Test below, exactly at and above the boundary.
If another assigned profile has a lower priority number and also matches, that earlier profile wins. See Priority and First Match.