
Configure DATEV Export
Open Stores > Configuration > MageB2B > DATEV Export Pro. Configure one website or store scope at a time when accounting data differs between storefronts.
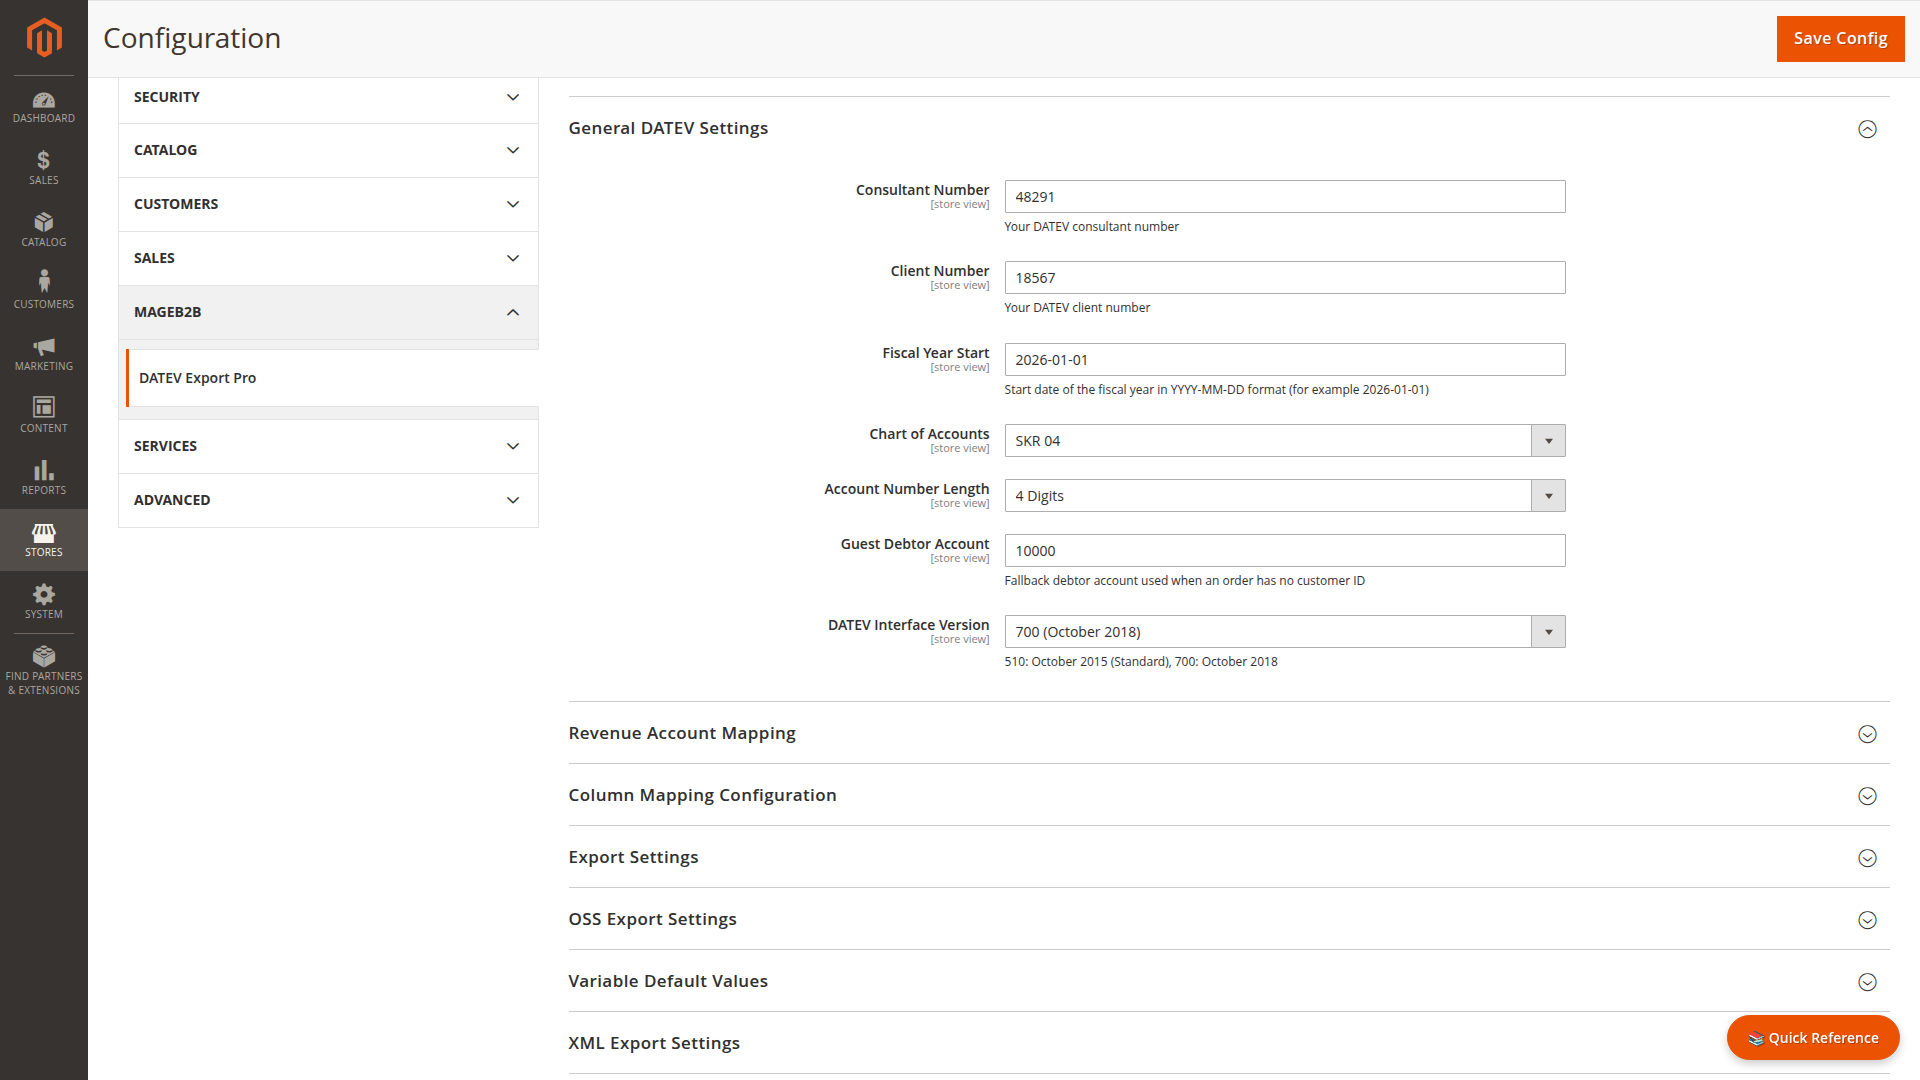
1. Enter the accounting identifiers
In General DATEV Settings, enter the consultant number, client number, fiscal-year start, chart of accounts, and account-number length agreed with your accounting partner. The fiscal-year start uses YYYY-MM-DD.
Set Guest Debtor Account to the fallback account for documents that do not resolve a customer account from the Konto mapping. Do not leave the supplied example values in production unless they match your accounting setup.
The DATEV Interface Version is written into the EXTF header. Use the value accepted by the receiving import process.
2. Map revenue accounts
The revenue-account table assigns an account and tax rate to each location type:
- Domestic for Germany
- EU for countries in Magento's EU country list
- Third country for other destinations
The built-in getRevenueAccount and getTaxRate mapping functions read this table. Review every row with your accountant before relying on it.
3. Choose eligible documents
In Export Settings, select the invoice and credit memo states that may be exported. These filters apply to Admin, command-line, cron, and OSS workflows.
An invoice outside the selected states is omitted even when its date and store match.
4. Review the mappings
Invoice and credit memo CSV mappings are separate JSON objects. XML and customer master data have their own mappings. Use Validate Mapping after every change, then export a small sample.
See Column Mapping and Mapping Language.
5. Configure optional XML output
In XML Export Settings:
- choose the schema expected by the receiving workflow
- keep XSD validation enabled while testing
- choose Extended XML Package when the recipient needs individual document XML files
- choose DATEV Transfer-Compatible Package when the recipient expects
document.xmland GUID-based PDFs at the ZIP root
The XML generator writes UTF-8. There is no separate encoding setting for XML exports. DATEV booking CSV files continue to use Windows-1252.
If you select CSV and XML together, the export keeps the accounting data and XML documents in separate ZIP archives. The receiving system must import each archive through its matching interface.
See XML Export before sending the package to an accounting partner.
6. Configure optional master data
Enable master data export when the recipient also needs customer debtor records. Select whether billing or shipping addresses take priority and review the 254-column mapping.
See Master Data Export.
7. Configure email delivery
In Email Settings (DATEV + OSS), enable email export, select a Magento sender identity, and enter the recipient. The PDF and master-data switches apply to DATEV document exports, not OSS reports.
The cron section can provide a separate recipient. If that field is empty, scheduled delivery uses the recipient from Email Settings. Exports that create several packages send them as separate attachments in the same email.
8. Configure automatic exports last
Enable automatic export only after a matching manual export has been checked. Select invoices, credit memos, date range, format, store, and optional attachments. Use a normal cron expression such as 0 2 * * * for 02:00 each day.
Magento cron must already run reliably. The job code is datev_auto_export.
See Automated Exports.
OSS settings
OSS and IOSS reporting has a separate configuration group. It controls the member state, reporting scheme, B2B detection, optional VIES validation, currency handling, and IOSS order attributes. These choices affect which transactions appear in the summary.
Use OSS Export for the full setup and classification boundaries.